Categories
NowLight Our Mission

NowLight wins grant for Pay as You Go trials

We are delighted to announce that Deciwatt has won a £174,000 grant from Innovate UK to trial nowlight in two countries in South Asia and sub-Saharan Africa. More specifically, we will use the trials to find ways of making nowlight financially accessible to households with very low incomes.

There are just under one billion people in the world who still have no access to electricity. Many of these people rely on dangerous, expensive and polluting kerosene lamps for light. Furthermore, many do not have electricity but do own a mobile phone and must pay every time that they need to charge it.

We believe that nowlight has the potential to provide these households with access to clean, reliable and affordable power. In fact, by eliminating the need to buy kerosene or pay for mobile phone charging, we expect nowlight to pay for itself in less than a year.

However, the great majority of people who do not have electricity cannot afford to purchase a product like nowlight in one go. As such, we need to find ways of allowing these customers to pay for a nowlight in manageable small instalments.

Using the grant from Innovate UK, we will work with local partners to experiment with different approaches that can make nowlight more financially accessible. These will include customers borrowing the money to purchase nowlight from a community lending group and using integrated Pay-As-You-Go (PAYG) technology.

PAYG technology will mean that the user is only required to pay a small deposit in order to receive their nowlight. Much like a pre-paid mobile phone, the nowlight will provide light and power until the customer runs out of credit. For example, perhaps the credit a user purchases when they pay the deposit will allow them to enjoy 200 hours of light.

User’s will be able to see how much credit they have and will see warnings when their credit is running low. If the user’s credit completely runs out, the technology in the nowlight will deactivate the unit. When the user buys more credit, the product will be reactivated. The user will repeat this process of buying and using credit until they have paid the full price of the nowlight.

As shown in the picture below, we expect customers will be able to purchase credit through their mobile phone and they will receive a code that they can enter into the nowlight.
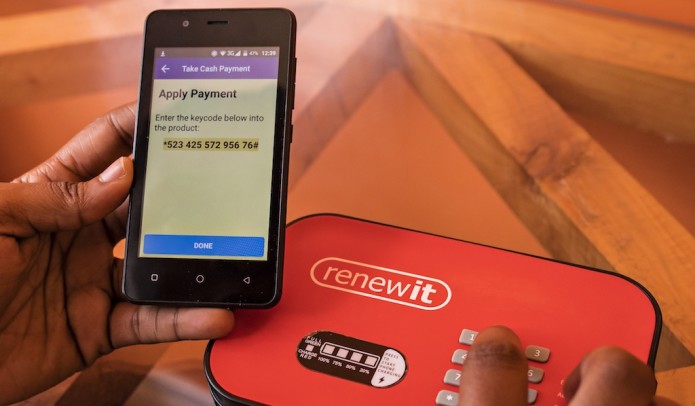
PAYG devices usually have a keyboard for code entry

PAYG technology has already been implemented by some other organisations that sell energy products. As you can see from the picture above, typically the PAYG product has an integrated keyboard that allows the user to enter the code they receive when purchase credit.

This presents an interesting challenge as it would be expensive to integrate a keyboard into nowlight and clearly our goal here is to make nowlight more financially accessible. Therefore, instead of using a keyboard, we plan to allow users to cycle through numbers by pulling on nowlight’s cord. When the correct number shows on the nowlight’s display, the user will press one of the nowlight’s buttons to confirm they want to enter that digit and move to the next number of the code.

Although this project won’t start until later in 2019, we know many of you supported our campaign because you were excited by the potential that nowlight has help those who live without electricity. We hope that you are as pleased as we are about this grant, which will help us understand how to get nowlight to those who need it most.
Categories
NowLight

Please read the manual

What do you do when you buy a new product, take it home and open the box? My usual approach is start playing with the product immediately. If an instruction manual is supplied, it will get ‘filed’ in a draw for future reference.

It’s great when a product is so intuitive and easy to use that you don’t need to look at the instructions, because everything just works exactly as you would expect it to. As such, ensuring that nowlight is easy to use has been at the front of our minds during the product design and development process.

Yet situations will inevitably arise where nowlight users will need to consult some instructions. When that happens, it’s important that those instructions are clear and easy to follow. But as we have learned, arriving at a simple set of instructions is likely to be the outcome of a long and complex process! In this update, we share what it took to create the nowlight user manual.

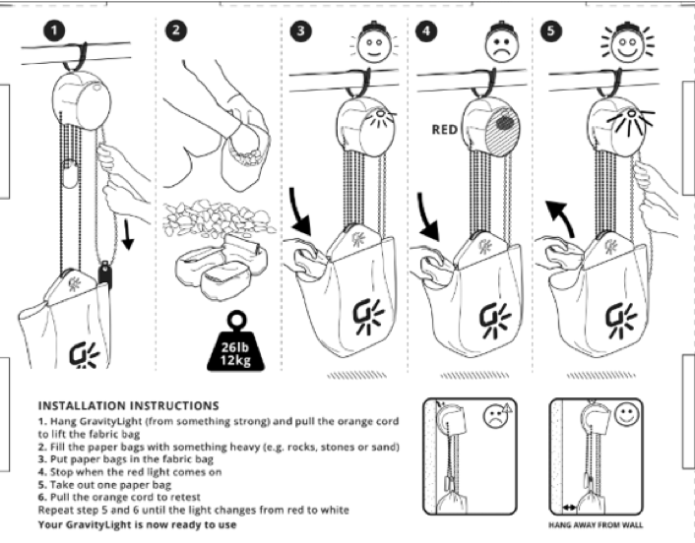
A section of the GravityLight manual

From the experience of creating our first product GravityLight, we knew that we wanted to focus on using visuals rather than text to explain how nowlight functions. Our goal is to see nowlight used all over the world. As such, we need to make sure that anyone can understand the instruction manual, regardless of the language they speak or whether they can read.

However, we received feedback that the user manual for GravityLight, which was a single sheet of paper, did not provide sufficient information for some users. We knew that we needed to create a more detailed user guide for nowlight, but without providing an overwhelming amount of information.

We decided at an early stage that we had to develop the user manual in parallel with the product itself. We couldn’t just create the manual as an afterthought once we had done everything else.

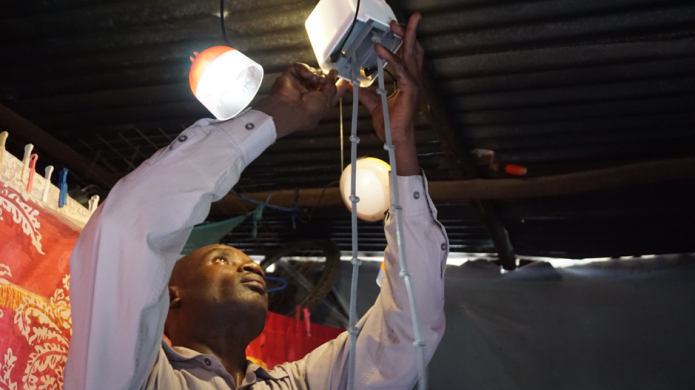
User trials in Kenya helped us understand what information should be included in the user manual

You may recall from our last update that we conducted user trials in Kenya in December 2017. From these and other trials, we gained an opportunity to observe how users interacted with nowlight. This provided us with the insights we needed to create a first draft of the nowlight user manual.

Two pages from an early draft of the user manual

One of the surprising outcomes of this process was that early drafts of the user manual became a vehicle for discussing the development of the product itself. For example, in meetings we can work through the user manual and discuss the status of the features described on the different pages.

As the nowlight product evolved we continued to hold regular reviews to update the content of the manual. Even once the design and functionality of the product had been finalised, it still took many iterations to find the most effective way of presenting the information.

An easy trap to fall into when creating a user manual, is to produce something that makes perfect sense to its authors, who already understand the product and how it works, but is inscrutable to anyone who is encountering a product for the first time. For this reason, we regularly invited other people to read the manual and use it with our prototypes.

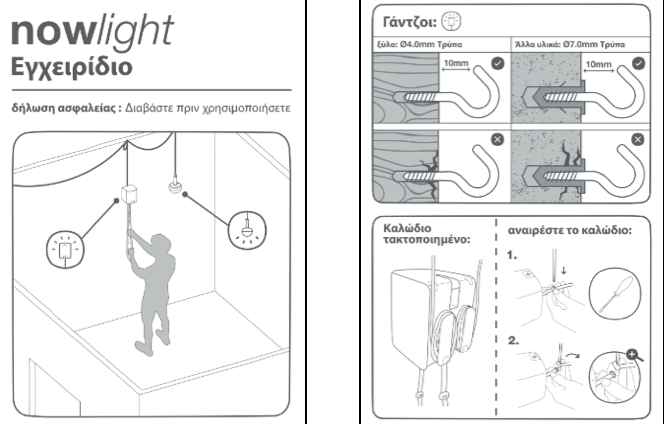
The nowlight manual: it’s all Greek to me…

To make sure that they would understand how to use nowlight using only the visual content, we translated all the written content in the manual into Greek (a language not spoken by any of our test subjects). This mimics the experience that someone will have if they don’t speak English or any of the languages that we will supply translations for.

Through this process we gained a lot of useful insights. Some of these led to big changes in the way we presented information. For example, we received feedback that early versions of the manual tried to present too much information on each page.

We also made some very small, though still important, changes to the user manual. A personal favourite of mine was the request that we make clock icons more ‘clocky’ because it wasn’t obvious what they were!

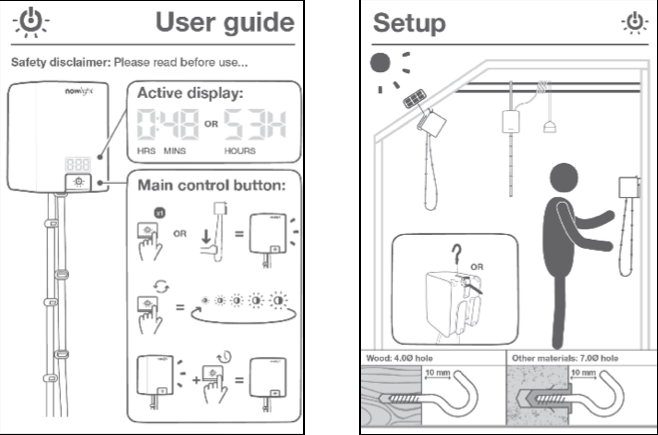
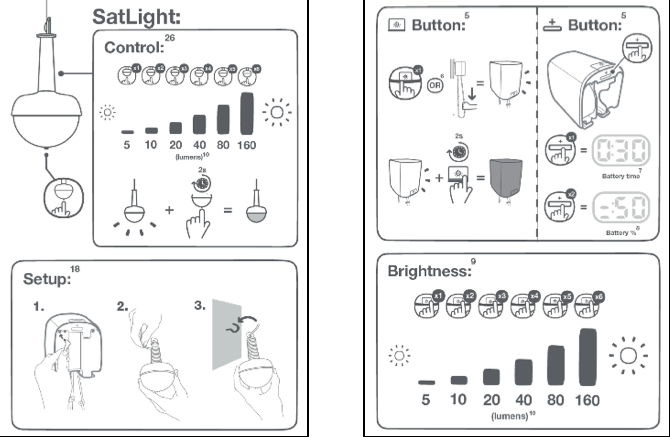
A sneak preview of the finished manual…

After a lot of work, we’ve reached a point where the user manual is more or less finished and we’re really happy with it. That said, we’re sure there are still lots of ways it could be improved. In fact, we hope that all of you will play a role in making it better over time!

Categories
NowLight

How do you hang a nowlight?

This week we share the second in a series of updates about all the work that has gone into creating nowlight. Even small details of the design are often the result of many months of experiments and iteration, and we’re excited to give you a greater insight into the product design process.

As you know, a nowlight is designed to be hung from a wall or ceiling. In this update we’ll explain what we learned about how different users would want to install their nowlight and how we adjusted the design to accommodate this.

First, it’s important to appreciate that thinking through how users will install their nowlights is really important to ensuring the product will be useful. A nowlight must hang securely so that a user can confidently pull on the cord and generate power.

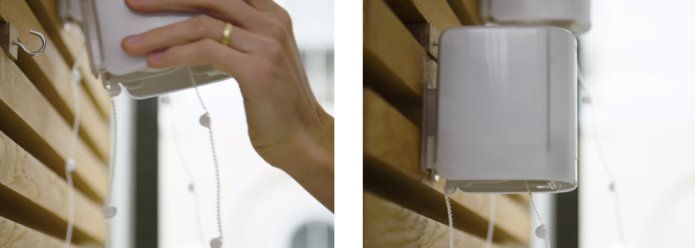
The nowlight is securely hooked to the wall through a slot in the outer casing

Our primary installation method is via a hook that is screwed into a wall. This is a very secure way of installing a nowlight and it can be attached to, or detached from a wall, very quickly.

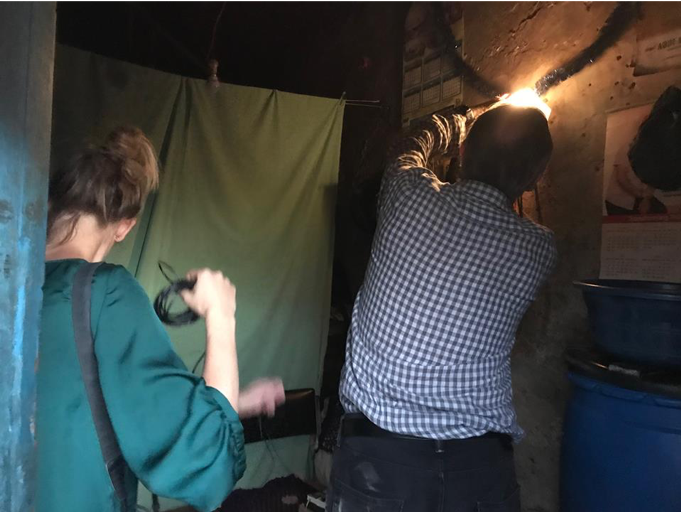
In December 2017 we went to Kenya with early nowlight prototypes to conduct user trials. We observed users in different environments and although screwing a hook into a wall worked well for some users, it became clear that this wouldn’t be convenient for the majority.

We travelled to Kenya in December 2017 to run user trials

For walls made of some materials, such as brick or stone, screwing a hook into a wall is likely to require drilling a hole and possibly installing a wall plug. In Kenya, we found that many people did not have access to the tools to do this.

Most of the users in our trial preferred to nail products to the wall. This approach works well because even a stone wall may have a crack that a nail can be worked into.

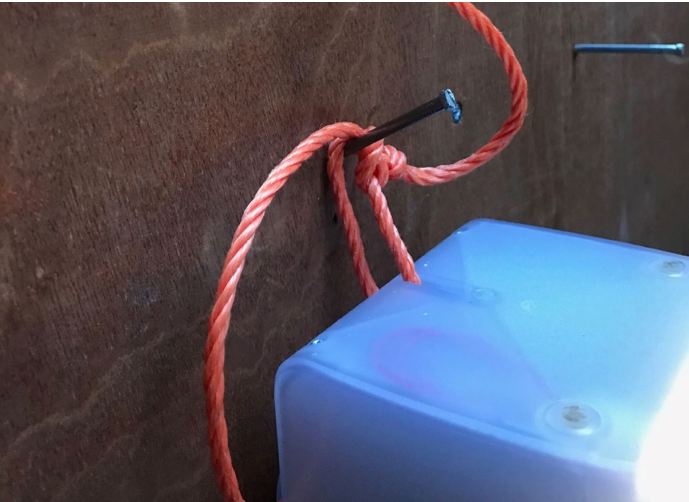
A nowlight can also be installed by looping a cord through the outer casing

We quickly realised that nailing a nowlight directly to the wall was not a viable option. However, using a strong piece of cord we could securely hang the nowlight from a nail. This is why we every nowlight will come with a length of cord, as well as two hooks.

Why two hooks? Because during the trials in Kenya, we also observed that many users will want to move the nowlight around their home at different times of day. Including a second hook in the box means that when users want to move their nowlight to a different part of their house, they don’t need to move the hook as well.

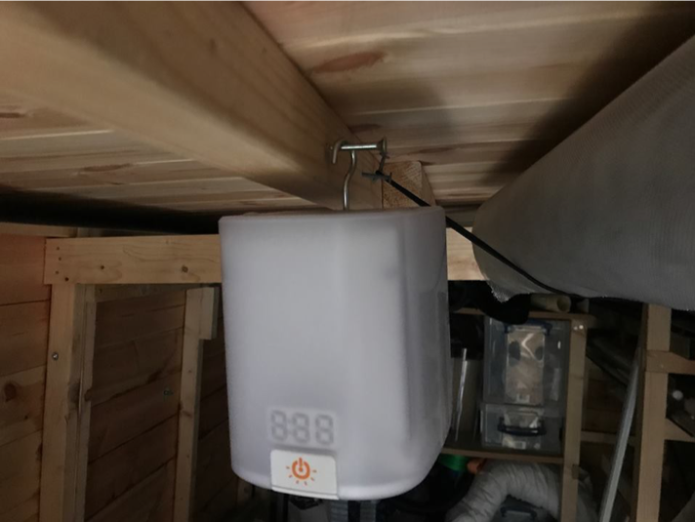
Finally, during the trials it we discovered that some users would want to hang the nowlight from overhead beams. To accommodate this, we added a hole in the top of the casing. The hooks we supply with nowlight can be screwed into this hole. A user can then hang the nowlight from a nail or attach the hook to a cord.

A hook can be screwed into the top of a nowlight in order to hang it from a beam or ceiling

In short, there are many ways to install your nowlight, for either temporary or long-term use in a given location. We are sure that all of you will find many more ways to install a nowlight, such as using a small carabiner to clip it to a bag on a camping trip. We’re excited to see how you will use yours!