This week we share the second in a series of updates about all the work that has gone into creating nowlight. Even small details of the design are often the result of many months of experiments and iteration, and we’re excited to give you a greater insight into the product design process.
As you know, a nowlight is designed to be hung from a wall or ceiling. In this update we’ll explain what we learned about how different users would want to install their nowlight and how we adjusted the design to accommodate this.
First, it’s important to appreciate that thinking through how users will install their nowlights is really important to ensuring the product will be useful. A nowlight must hang securely so that a user can confidently pull on the cord and generate power.

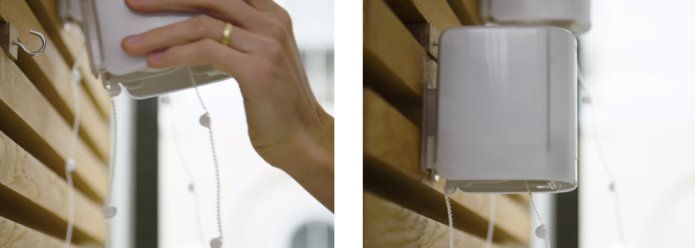
The nowlight is securely hooked to the wall through a slot in the outer casing
Our primary installation method is via a hook that is screwed into a wall. This is a very secure way of installing a nowlight and it can be attached to, or detached from a wall, very quickly.
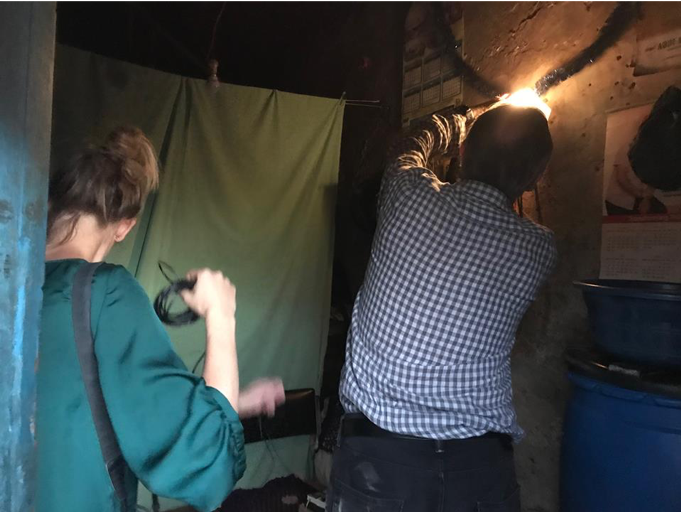
In December 2017 we went to Kenya with early nowlight prototypes to conduct user trials. We observed users in different environments and although screwing a hook into a wall worked well for some users, it became clear that this wouldn’t be convenient for the majority.

We travelled to Kenya in December 2017 to run user trials
For walls made of some materials, such as brick or stone, screwing a hook into a wall is likely to require drilling a hole and possibly installing a wall plug. In Kenya, we found that many people did not have access to the tools to do this.
Most of the users in our trial preferred to nail products to the wall. This approach works well because even a stone wall may have a crack that a nail can be worked into.

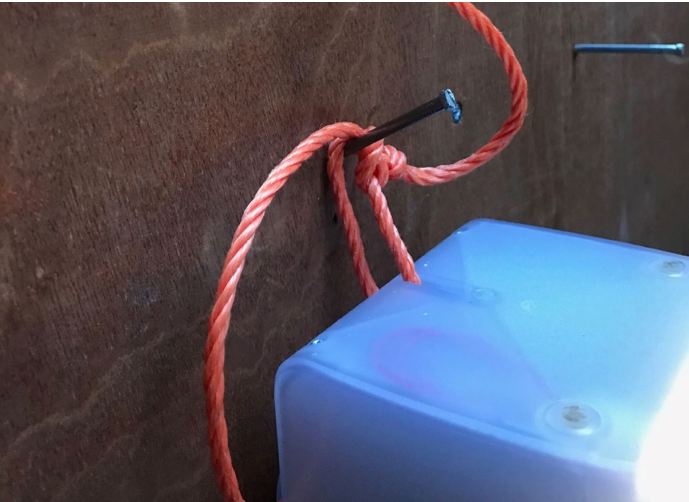
A nowlight can also be installed by looping a cord through the outer casing
We quickly realised that nailing a nowlight directly to the wall was not a viable option. However, using a strong piece of cord we could securely hang the nowlight from a nail. This is why we every nowlight will come with a length of cord, as well as two hooks.
Why two hooks? Because during the trials in Kenya, we also observed that many users will want to move the nowlight around their home at different times of day. Including a second hook in the box means that when users want to move their nowlight to a different part of their house, they don’t need to move the hook as well.
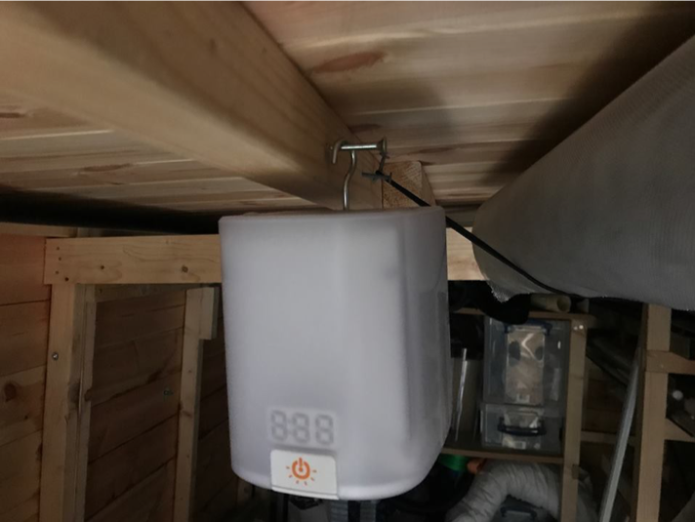
Finally, during the trials it we discovered that some users would want to hang the nowlight from overhead beams. To accommodate this, we added a hole in the top of the casing. The hooks we supply with nowlight can be screwed into this hole. A user can then hang the nowlight from a nail or attach the hook to a cord.

A hook can be screwed into the top of a nowlight in order to hang it from a beam or ceiling
In short, there are many ways to install your nowlight, for either temporary or long-term use in a given location. We are sure that all of you will find many more ways to install a nowlight, such as using a small carabiner to clip it to a bag on a camping trip. We’re excited to see how you will use yours!

